Complete Drone Workflow: Professional Ronda Cityscape Edit
If you want to capture gallery-worthy aerial shots, you need a professional drone workflow that goes beyond hitting the shutter button and hoping for the best. In this guide, I’ll show you exactly how I edited a massive cityscape of Ronda, Spain, using four different RAW exposures to achieve maximum detail.
Most beginners make the mistake of relying on a single exposure, which often leads to blown-out city lights or muddy shadows. By following my professional process, you can transform a standard drone shot into a high-resolution masterpiece that stands out on any screen or print.
Get the RAW Files
Practice the exact techniques from the video. Download the high-resolution RAW files from this shoot for free.
Download RAW FilesMastering Composition and Altitude
In Ronda, the goal was to showcase the massive elevation and the iconic bridge. I kept the drone at a specific altitude to ensure the roads were visible without causing extreme building distortion. I also left just a narrow strip of sky at the top to keep the viewer’s focus entirely on the city and the waterfall below.
I always shoot in sets of three or more, even if I think one is enough. Wind can move your drone mid-shot, and having multiple exposures ensures you have the dynamic range needed to save the highlights in the city lights while keeping the valley detail.
Lightroom Foundations: Preparation and Upscaling
I start by using the Super Resolution feature in Lightroom to turn a 12-megapixel file into something much more substantial. This gives me more pixels to work with during the heavy editing phases. I also apply lens corrections and a custom white balance to get the "blue hour" tones exactly right.

One of my favorite tricks is using the Calibration panel. I push the blue primary saturation up and adjust the red primary hue to get those rich, cinematic oranges in the city lights. This creates a professional color contrast that is difficult to achieve with standard saturation sliders.
Photoshop Blending: Merging the 4 Exposures
Once the files are imported as layers in Photoshop, I align them to correct for any drone movement. I use a "Base Image" for the shadow areas in the valley and then mask in the "City" layer for the urban lights. This manual blending ensures that every part of the image has the best possible quality from the original RAW data.
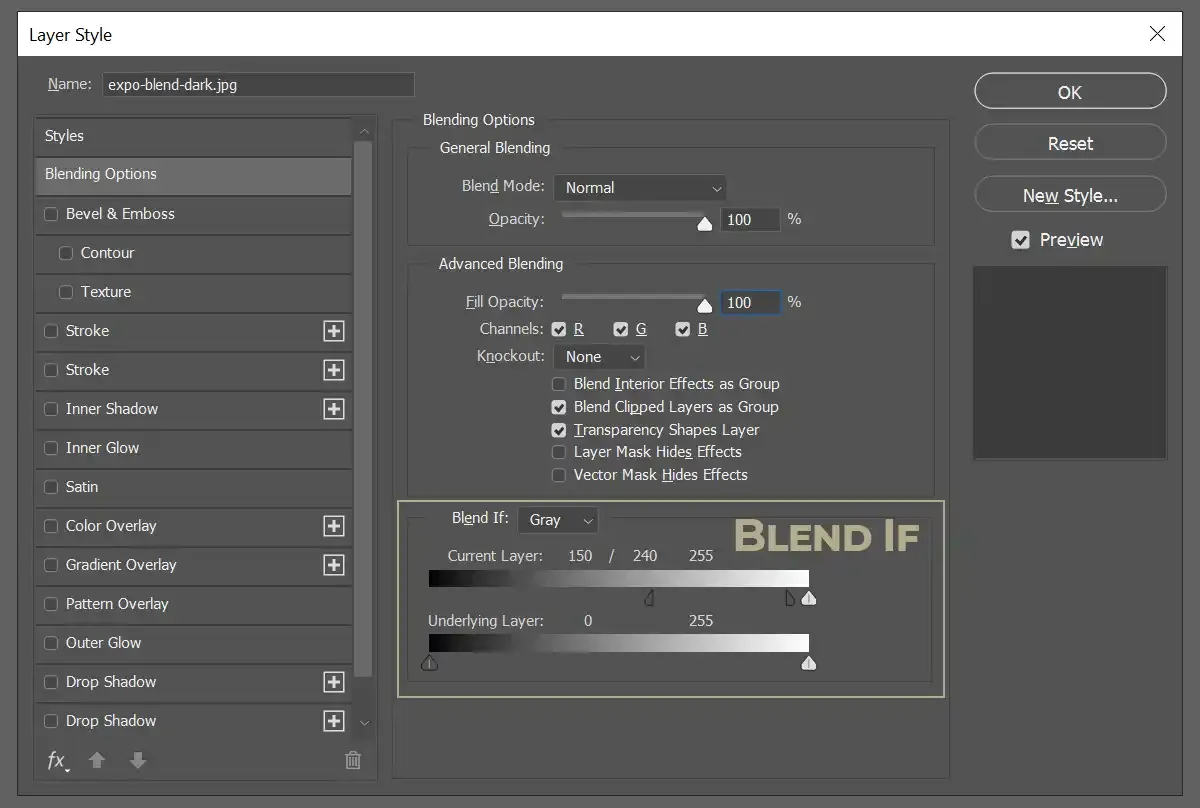
For the brightest highlights, I use the "Blend If" technique. This allows me to selectively pull detail from the underexposed shots only in the brightest light sources. It’s a fiddly job, but the extra effort is what separates a pro shot from a casual snap.
The Pro Finish: Orton Effect and Sharpening
The final stage involves a Camera Raw filter to draw the viewer’s eye toward the bridge using radial and linear gradients. I slightly darken the edges and brighten the waterfall to create a clear focal point. Without this directed light, the image can feel flat and disorganized.
I always finish with a subtle Orton Effect for a professional glow and a High Pass sharpening layer. These final touches add that "expensive" look to the image, making the textures pop while keeping the overall mood soft and atmospheric.
Conclusion: Download the RAWs and Try It
Mastering this drone workflow isn't about having the most expensive gear; it's about the discipline of the edit. I’ve made the RAW files available for free so you can follow along and practice these techniques yourself. Go grab them, open up Photoshop, and let's get to work.